
Welcome to the Honeywell RTH6580WF Wi-Fi Programmable Thermostat manual. This guide provides step-by-step instructions for installation‚ configuration‚ and maintenance‚ ensuring optimal performance and energy efficiency.

Unboxing
Upon opening the package‚ you will find the Honeywell RTH6580WF thermostat‚ a mounting bracket‚ screws‚ and a user manual. Ensure all components are included and undamaged. The thermostat features a sleek design with a large‚ easy-to-read display. Additional items like a C-wire adapter may be provided for compatibility with systems lacking a common wire. Carefully inspect the contents to confirm everything is present and in good condition. If any items are missing or damaged‚ contact Honeywell support immediately. This step ensures a smooth installation process and proper functionality of your Wi-Fi programmable thermostat.

Safety Precautions
Before installing the Honeywell RTH6580WF thermostat‚ ensure the power to your HVAC system is turned off at the circuit breaker or fuse box. Never attempt installation with live power‚ as this can cause electrical shock or damage. Avoid touching internal components to prevent static discharge. Use appropriate tools and follow all safety guidelines to prevent injury or system malfunction. If your system involves water or gas‚ ensure all valves are closed before starting work. Do not expose the thermostat to water or extreme temperatures. Always follow local safety codes and regulations. If unsure‚ consult a licensed professional for assistance.
System Requirements
The Honeywell RTH6580WF thermostat requires a compatible HVAC system‚ a Wi-Fi network‚ and a C-wire for power. Ensure your system meets these requirements before installation.
4.1 Compatibility Check
Before installing the Honeywell RTH6580WF thermostat‚ ensure compatibility with your HVAC system. Most heating and cooling systems are compatible‚ but verify your system type and wiring configuration. Check for a C-wire‚ as it is required for proper operation. If your system lacks a C-wire‚ consider installing one or using a C-wire adapter. Additionally‚ confirm that your Wi-Fi network operates on a 2.4 GHz frequency‚ as the thermostat is not compatible with 5 GHz networks. Compatibility checks ensure smooth installation and optimal performance of your Honeywell RTH6580WF thermostat.
4.2 Technical Specifications
The Honeywell RTH6580WF thermostat features a 7-day programmable schedule with a large‚ backlit touchscreen display. It supports heating and cooling systems‚ including heat pumps‚ and requires a C-wire for operation. The thermostat is compatible with 24V HVAC systems and works with most standard wiring configurations. It operates on a 2.4 GHz Wi-Fi network for remote access and voice control through smart home systems. The device measures 4.5 x 4.29 x 1.02 inches and has a temperature range of 40°F to 90°F (4°C to 32°C). It also supports humidity control when connected to a humidifier or dehumidifier. The thermostat is energy-efficient and designed for long-term reliability.
Installation Process
Turn off power to your HVAC system. Remove the old thermostat and connect the wires to the RTH6580WF. Ensure the C-wire is connected for Wi-Fi functionality. Mount the new thermostat‚ restore power‚ and follow on-screen instructions to complete the setup. Refer to the manual for detailed wiring diagrams and compatibility checks.
5.1 Tools Needed
To install the Honeywell RTH6580WF thermostat‚ you will need a few essential tools. Start with a screwdriver for removing the old thermostat and mounting the new one. Wire strippers may be necessary if you need to trim or connect wires. A voltage tester is recommended to ensure the power is off before starting. Additionally‚ a level will help you mount the thermostat straight. If drilling holes for wiring‚ a drill and bits will be required. Lastly‚ a ladder or step stool may be needed for safe access. Gather these tools beforehand to streamline the installation process and ensure safety. Proper preparation is key to a successful setup.
5.2 Wiring Guide
When wiring the Honeywell RTH6580WF thermostat‚ ensure the power to your HVAC system is turned off. Identify the wires from your old thermostat and label them for reference. Connect the wires to the corresponding terminals on the new thermostat‚ matching the labels (e.g.‚ R‚ W‚ Y‚ G‚ C). If your system lacks a C (common) wire‚ you may need an adapter or use the provided jumper wire. Secure all connections tightly to avoid loose wires‚ which can cause malfunctions; Double-check the wiring diagram provided in the manual to confirm compatibility and proper connections. This step is crucial for ensuring the thermostat operates correctly and safely.
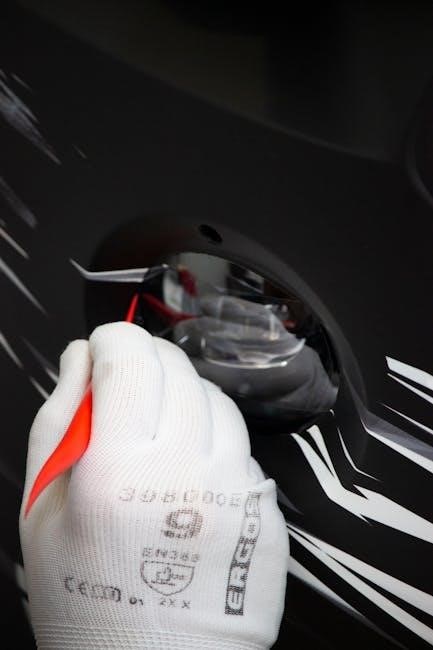
5.3 Physical Installation Steps
Start by turning off the power to your HVAC system at the circuit breaker. Remove the old thermostat and gently pull out the wires. Use the provided template to mark the wall for the new thermostat’s mounting holes. Drill pilot holes and insert the wall anchor‚ then screw the base plate into place. Align the thermostat with the base plate and snap it on. Ensure the device is level and securely fastened. If necessary‚ use the included wall anchors for stability. Once installed‚ turn the power back on and test the thermostat to confirm proper operation. Follow the on-screen prompts to complete the setup.
Configuring the Thermostat
Connect the thermostat to your Wi-Fi network and follow the on-screen instructions to complete the initial setup‚ including scheduling and temperature preferences for optimal performance.
6.1 Wi-Fi Network Setup
To connect your Honeywell RTH6580WF thermostat to your Wi-Fi network‚ ensure your router is nearby. Power on the thermostat and select your network from the available list. Enter your Wi-Fi password when prompted. If prompted‚ update the thermostat’s firmware. Once connected‚ a confirmation message will appear. Use the Honeywell Home app to verify the connection and complete any additional setup steps. A stable internet connection is crucial for remote access and smart features. Refer to the user manual for troubleshooting tips if connectivity issues arise during setup.
6.2 Initial Configuration
After connecting to Wi-Fi‚ navigate to the initial configuration menu. Select your system type (e.g.‚ forced air‚ heat pump) and configure heating and cooling schedules. Choose your preferred temperature settings and adjust the thermostat’s sensitivity for precise control. Set your location to enable geofencing and smart features. Use the Honeywell Home app to finalize configurations‚ such as remote access and voice assistant integration. Ensure all settings are saved before exiting. The thermostat is preprogrammed with default settings but allows customization to suit your comfort preferences. Refer to the manual for advanced customization options and troubleshooting tips during setup.
Registering the Device
After completing the initial setup‚ register your Honeywell RTH6580WF thermostat to enable remote access and smart features. Visit the Honeywell Home website or use the QR code provided in the manual to access the registration page. Create or sign in to your Honeywell account‚ then enter the thermostat’s serial number and other required details. Follow the on-screen instructions to link your device. Once registered‚ you’ll receive a confirmation email. This step is essential for accessing advanced features like geofencing and voice control through the Honeywell Home app. Ensure your email address is correct to receive updates and notifications;
Programming the Thermostat
Programming the Honeywell RTH6580WF thermostat allows you to set custom temperature schedules for optimal comfort and energy savings. Use the touchscreen interface to create a 7-day schedule‚ adjusting temperatures for different times of the day. Start by navigating to the “Schedule” menu‚ then select the day(s) you want to program. Choose the time and desired temperature for heating and cooling modes. Save your settings to apply the schedule. For convenience‚ pre-programmed settings are available‚ but you can modify them to suit your preferences. Additionally‚ enable features like home/away modes or geofencing through the Honeywell Home app for smarter temperature control. Regular updates ensure the thermostat adapts to your lifestyle seamlessly.
Maintenance Tips
Perform regular checks‚ clean the display‚ and ensure proper software updates to maintain optimal performance and extend the lifespan of your Honeywell RTH6580WF thermostat.
9.1 Regular Checks
Regular checks are essential to ensure your Honeywell RTH6580WF thermostat operates efficiently. Inspect the display for clarity‚ clean it gently with a soft cloth‚ and verify that all buttons function properly. Check wiring connections to prevent loose links‚ which can cause malfunctions. Ensure the thermostat is level to maintain accurate temperature readings. Also‚ review your programmed settings periodically to align with your schedule and preferences. These routine checks help prevent issues and maintain optimal performance‚ ensuring your home remains comfortable while saving energy. Regular maintenance is key to extending the lifespan of your thermostat and heating/cooling system.
9.2 Software Updates
Regular software updates are crucial for maintaining optimal performance and security of your Honeywell RTH6580WF thermostat. Updates often include bug fixes‚ new features‚ and performance improvements. To update‚ ensure your thermostat is connected to Wi-Fi. The device typically updates automatically when new software is available. If automatic updates are disabled‚ navigate to the settings menu and manually check for updates. Always follow the on-screen instructions to complete the update process. Keep your thermostat connected to a stable Wi-Fi network to receive notifications about new updates. Refer to the Honeywell Home app or user manual for detailed guidance on updating your thermostat’s software.

Troubleshooting Common Issues
Common issues include display malfunctions‚ temperature inaccuracies‚ or connectivity problems. Check wiring connections‚ ensure proper installation‚ and restart the system. Refer to the manual for detailed solutions.
10.1 Error Codes
The Honeywell RTH6580WF thermostat displays specific error codes to identify issues. Common codes include E1 for temperature discrepancies‚ E2 for sensor malfunctions‚ and E3 for communication failures. Refer to the user manual for detailed explanations and solutions. For example‚ E1 may indicate a faulty temperature sensor‚ while E2 could signal a wiring issue. Resetting the thermostat or checking connections often resolves these errors. If problems persist‚ contact Honeywell support for further assistance. Understanding these codes helps in diagnosing and resolving issues efficiently‚ ensuring optimal thermostat performance.
10.2 Connectivity Problems
Connectivity issues with the Honeywell RTH6580WF thermostat can occur due to weak Wi-Fi signals‚ incorrect network settings‚ or firmware glitches. Ensure your router is functioning properly and the thermostat is within range. Restart both the router and thermostat to reset the connection. Verify that the correct Wi-Fi network and password are entered during setup. If issues persist‚ check for software updates or perform a factory reset. Consult the user manual for troubleshooting steps or contact Honeywell support for assistance. Resolving connectivity problems ensures uninterrupted remote access and optimal performance of your smart thermostat.

Advanced Features
The Honeywell RTH6580WF thermostat offers advanced features like remote access via the Honeywell Home app‚ enabling users to adjust settings from anywhere. Geofencing technology automatically adjusts temperatures based on your location. Voice control compatibility with smart speakers enhances convenience. Energy usage reports provide insights to optimize your heating and cooling habits. Smart alerts notify you of extreme temperature changes or system issues. The thermostat also learns your schedule to deliver personalized comfort. These features ensure energy efficiency‚ convenience‚ and seamless integration with smart home systems‚ making it a cutting-edge solution for modern households seeking advanced temperature control and connectivity.

Warranty Information
Honeywell provides a limited warranty for the RTH6580WF thermostat‚ covering defects in materials and workmanship. The warranty period varies by region‚ typically offering coverage for up to five years. Registration is recommended to ensure warranty validity. For detailed terms‚ visit Honeywell’s official website or refer to the product packaging. Proper installation and adherence to maintenance guidelines are essential to uphold warranty conditions. Contact Honeywell support for any warranty-related inquiries or claims‚ ensuring your investment is protected and any issues are promptly addressed. This warranty underscores Honeywell’s commitment to quality and customer satisfaction‚ providing peace of mind for users.
With the Honeywell RTH6580WF Wi-Fi Programmable Thermostat‚ you’ve successfully enhanced your home’s comfort and energy efficiency. This manual has guided you through installation‚ configuration‚ and maintenance‚ ensuring seamless operation. By following the steps‚ you’ve optimized your thermostat for precise temperature control and remote access. Honeywell’s innovative design and user-friendly features make it easy to manage your home’s climate while saving energy. For any further assistance‚ Honeywell’s support resources are available. Enjoy the convenience and reliability of your new smart thermostat‚ knowing it’s designed to improve your home experience for years to come. Your comfort is now smarter than ever.